The Art of Pet Photography: Capturing Timeless Moments with Your Furry Friends

There is a photograph I keep coming back to: a black Labrador named Cooper, four years old, stretched flat on a window seat in late-afternoon February light, one eye tracking the photographer's hand without the rest of his head turning. It is not a complicated photograph. It is the photograph Cooper's owner Maeve will hang on her wall, and the one she will go back to in six years when Cooper is fourteen and starts to have bad days. Pet photography, done properly, is documentary work — it pays attention to one specific animal in one specific light, and it earns its keep when the years go by.
This guide is built on the assumption that most readers are shooting with whatever camera is already in their hand — usually a phone, sometimes a beginner mirrorless, occasionally a working setup — and that the question is less about gear than about how to use what you have well. I'll cover the gear ladder, the small number of technical fundamentals that change everything once you internalise them, dog- and cat-specific work, the welfare ethic that distinguishes a photograph the animal participated in from one they merely endured, and the legacy session — the photograph you make of an aging or terminally ill pet, the photograph you will be the most grateful for.
The Gear Ladder: Phone, Mirrorless, Pro
A note before any specifics. The right camera for pet photography is the camera you have with you when the pet does the thing. A phone in a pocket beats a mirrorless in a closet every time.
Phone (iPhone 15+ / Pixel 8+)
Modern phone hardware genuinely matches the use case for pet portraits and most candid work. Two specifics worth knowing in 2026:
- iPhone 15 Pro and later auto-detect pets as portrait subjects. When a cat or dog enters the frame, an aperture indicator appears at the bottom of the screen, and the phone will apply depth-of-field treatment without you toggling Portrait mode. Apple's documentation explicitly names cats and dogs as recognised subjects.
- Apple ProRAW captures DNG files that preserve the same multi-megabyte editing headroom a mirrorless camera would. Turn it on in Settings → Camera → Formats. ProRAW gives you enough latitude to recover detail from a black coat in shadow or a white blaze in sun without the file falling apart in editing (Moment, 2024).
- Action mode (iPhone 14 and later) provides gimbal-class stabilisation for moving pets. Burst mode captures 10 frames per second on a held shutter — enough to nail a single sharp frame from a running dog (How-To Geek).
- On the Android side, Pixel 8 and later with Magic Editor — now free for all Google Photos users at 10 saves per month, unlimited on Pixel devices or Google One Premium — lets you reposition the pet in the frame with generative fill for the gap left behind. Useful for fixing the inevitable "great expression but the dog is too far left" problem.
Phone photography settings, in plain language: hold the phone with two hands, tap to focus on the eye nearest the camera, lock focus and exposure with a long press if the pet is moving (yellow box on iPhone), shoot in burst mode for any motion, edit afterward in Lightroom Mobile or Snapseed.
Mirrorless (entry-level to enthusiast)
The single feature that has changed pet photography most in the past five years is animal eye autofocus. Every Canon EOS R-series body since the R10/R100 has it; Sony A7 IV/A7CR/ZV-E1, Fujifilm X-T5/X-S20/X-H2, and Nikon Z6III/Z8/Z9 all ship the equivalent (Canon Europe). Animal eye AF tracks a moving eye through the frame and removes the dominant historical failure mode — "tack-sharp ear, soft eye."
A working recipe for outdoor mirrorless pet photography:
- Mode: aperture priority (Av on Canon, A on most others) for portraits; manual with auto-ISO for action.
- Aperture: f/2.8–f/4 for single-pet portraits (subject separation); f/5.6–f/8 if multiple pets need to be in focus.
- Shutter speed minimum (more on this below): 1/250s stationary, 1/500s trotting, 1/1000s running.
- Autofocus: AF-C (continuous), with animal eye detection enabled.
- Drive mode: continuous burst at 10 fps minimum.
- Exposure compensation: −1/3 stop in bright sun; +1/3 stop in open shade; more on dark/light coats below.
A 50mm or 85mm prime is the most flattering lens for pet portraits at conversational distance. A 70–200mm zoom is the working pet photographer's standard for action work.
Pro (working photographer)
A working pet photographer setup is full-frame mirrorless (R5 II, A1 II, Z9, X-H2S equivalent), 24-70mm f/2.8 plus 70-200mm f/2.8 plus a fast prime (85mm f/1.2 or similar), and a continuous LED light system (not flash) for indoor work. Continuous LED is preferred over flash for studio pet sessions — flash can spook animals, and the heat from older modeling lights makes pets restless (COLBOR). For most readers of this guide, this tier is academic; I name it only so the gear ladder is complete.
Five Technical Fundamentals
Five things matter more than anything else for sharp, expressive pet photographs:
- Soft, directional light. Cloudy daylight, the open shade behind a building, or the 90 minutes after sunrise / before sunset are the canonical windows. Hard midday sun produces harsh shadows on the muzzle and squinting eyes. Light coming from the side rather than from directly above gives the eyes their dimensionality.
- A high enough shutter speed. The technical floor for moving pets is well-established and unchanged: 1/250s for stationary or slow-moving pets, 1/500s for trotting/walking, 1/1000s minimum for a dog running toward the camera (Unleashed Education, Five Freedoms Photography). Most underexposed motion-blurred pet photographs trace to a shutter speed of 1/100s or slower.
- A wide enough aperture. f/2.8 to f/4 produces the subject-from-background separation that makes a pet portrait feel like a portrait rather than a snapshot. Phones simulate this with computational portrait modes; mirrorless cameras do it optically with the lens.
- Focus on the eye nearest the camera. Always the eye closest to the lens; if both eyes are in plane, the eye that catches more light. A photograph of a sharp ear and a soft eye is a photograph of an ear.
- Eye-level perspective. Kneel, sit, lie flat — never shoot down on a small dog or you turn the head into a cone and the body into a foreshortened blob. Eye-level is the single highest-leverage move in pet photography.
The first four are technical settings. The fifth is a small physical commitment that most owners don't think to make, and it is the difference between a snapshot and a portrait.
Dog Photography
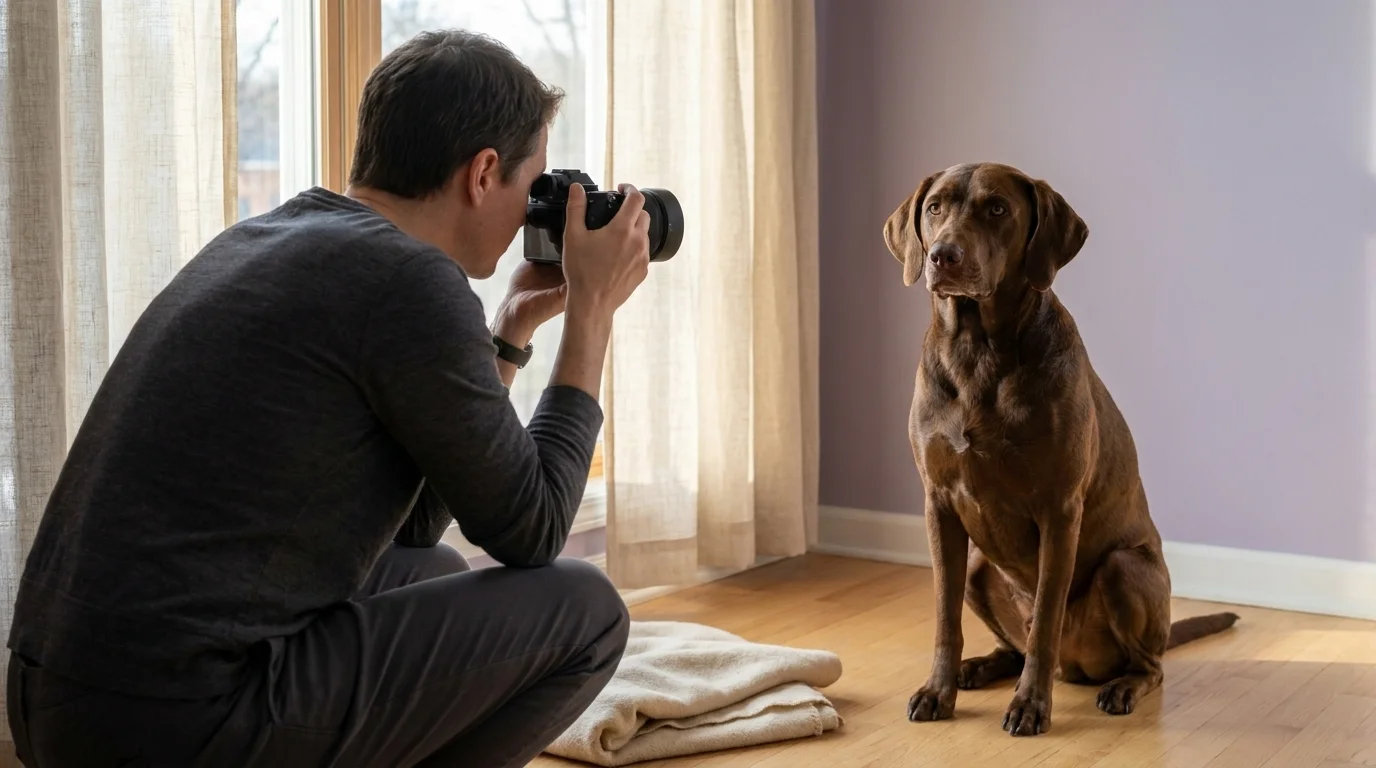
Dogs are easier subjects than cats because most are food-motivated and most accept a treat-trained focal point — a cued look at a treat held just above the lens — without much fuss. The portrait playbook for dogs:
- Walk the dog first. Twenty minutes of physical exercise before the session takes the edge off and produces calmer, more expressive frames. A photographed dog still tracks high arousal; let it wear off first.
- Eye-level, soft side light, treat-trained focal point. A treat held above the lens, released only when the camera fires, paired with a high-value reward. This is the standard professional technique and it's compatible with Fear Free principles because the dog leaves the session having earned rewards.
- Sound cues sparingly. A squeak toy, a kissy noise, a name call — each works once or twice per session and then loses its effect (Format Magazine). Overuse desensitises the dog to the cue.
Action photography for high-energy dogs
Unleashed Education's 7-step framework is the cleanest action recipe on the SERP. For a dog running toward the camera:
- Shutter: 1/1000s minimum, 1/1250s ideal.
- Aperture: f/2.8 wide open for subject separation.
- ISO: auto, capped high enough to maintain the shutter speed (typically 800–3200 outdoors, 6400+ indoors).
- Drive: continuous burst at 10 fps minimum, 30 fps if the camera supports it.
- Autofocus: AF-C with animal eye detection.
- Position: get below the dog's eye line; the running dog should be coming up toward the lens, not down at it.
Have the dog run a short straight line back toward the photographer rather than chasing them in circles. Two assistants — one to release the dog, one to call the dog — produce the cleanest sequences.
Photographing dark and light coats
The technical problem most amateur pet photographers don't realise they have is exposure compensation for non-medium coats. A black dog filling the frame fools the camera's meter into pushing exposure up — the meter tries to make everything middle gray and you end up with a flat, washed-out gray dog instead of a deep black one. The fix:
- Black, dark brown, or merle dogs: dial in −1/3 to −1 stop of negative exposure compensation. Shoot toward open shade or open sky so the dog is facing a soft light source — this gives the eyes their catchlights, which on a black dog is the difference between a portrait and a silhouette (Expert Photography, Five Freedoms Photography, Bark & Gold). Cloudy days are actually ideal for black dogs — the cloud is a giant softbox; harsh midday sun is the worst case.
- White, cream, or pale gold coats: dial in +1/3 to +2/3 stop of positive exposure compensation to keep the white from being rendered gray. Even light is essential — direct sun will burn out the highlights on a white chest blaze, and you cannot recover blown highlights in post.
- Underexposing slightly is safer than overexposing. You can recover detail from shadows in Lightroom; you cannot recover detail from blown highlights. For mixed-coat dogs (a black Lab with a white blaze), expose for the white.
Catchlights — small reflections of the light source in the eye — are non-negotiable on dark dogs. No catchlight, no portrait. Position the dog so a window or open sky is in front of them; the eye does the rest.
Cat Photography
Cats are different subjects from dogs, and the work changes accordingly. They are not as food-motivated as dogs (the 2021 Delgado study in Animal Cognition found that cats prefer freely available food over food that requires effort — they are not contra-freeloaders), they will not perform on cue, and they are often photographed indoors in lower light than dogs. The result: cat photography rewards patience over preparation.
A working approach:
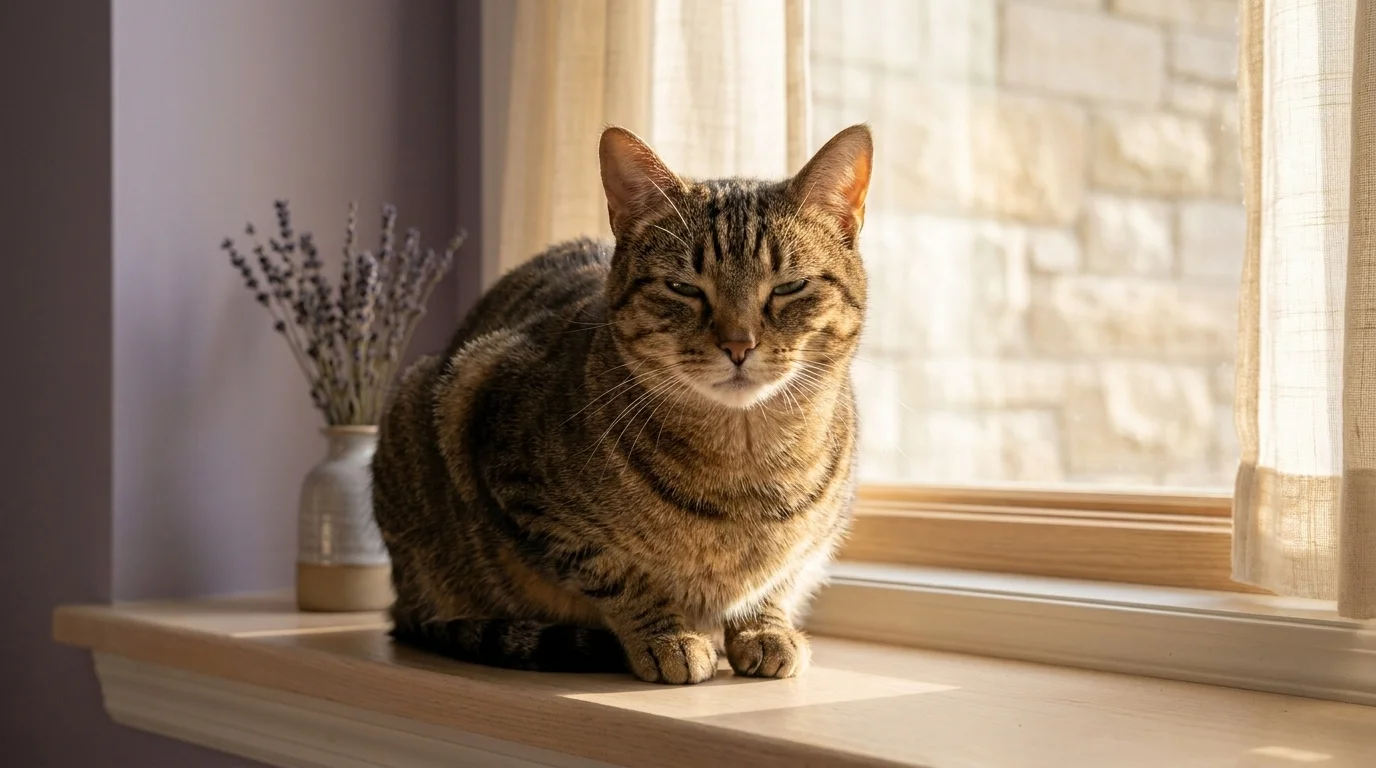
- Indoor low-light bias. Most cat photographs happen indoors, on a windowsill or sofa, in light that is dimmer than ideal. Push ISO to 1600–3200 on mirrorless or use the phone's Night mode for portraits; combine with a steady hand or a small support (table corner, knee). A cat in a well-lit window is the easiest cat to photograph; the light comes to you.
- Patience-first. Sit down with the camera ready. Wait. The cat will come to you eventually if you don't pursue them, and the resulting photograph will look like cooperation rather than capture. Five quiet minutes of waiting beats fifty seconds of cued shooting.
- Capture the play moment. Wand toys, feathers, and prey-completion play (the predatory sequence ending in a "catch") produce the most expressive cat photographs. A second person handling the wand toy while you shoot is the standard professional setup.
- Detail shots are an underused genre in cat photography. Paw beans, the tail tip, the half-closed eye, the bunting against the doorframe — these are the photographs that hold up over time. Get close (50mm or 85mm prime, or the phone's 2× zoom) and let the rest of the cat be implied.
- Slow blink at the cat. A slow, soft blink is the feline gesture for trust. Returned slow blinks during a photograph produce calmer, more present cats.
For black cats, the same exposure compensation guidance applies: −1/3 to −1 stop, catchlights non-negotiable, open shade or window light. For white or cream cats: +1/3 to +2/3 stop, even light, expose for the white.
Small Pets and Exotics
Small pets — rabbits, guinea pigs, hamsters — and exotics are best photographed in their familiar environment, in available light, with no flash. A few specific considerations:
- Rabbits and guinea pigs are most expressive at eye level on the floor. A long lens (85mm or 135mm equivalent) keeps you far enough back not to startle.
- Reptiles and amphibians photograph beautifully in tight macro but require steady light and a stable subject — most species are stationary if you wait for the right moment, and a window-side enclosure provides natural light. Avoid handling stress; photograph in the enclosure if at all possible.
- Birds require a fast shutter (1/500s minimum) and a long lens for any flight or display work; for in-cage portraits, the phone often produces better images than a mirrorless because the autofocus has less depth to navigate.
The welfare rule for exotics is the welfare rule for all pets: if the animal is showing stress, the session is over. Sessions are shorter for exotics — 15 minutes is often the upper bound before stress signs accumulate.
Reading Your Pet: Body Language and Consent
This is the section the rest of the SERP avoids, and it's the section that determines whether a photograph is a portrait or an extraction. Pets have body-language vocabularies that telegraph stress before they telegraph distress, and a session-ending signal in either species is a session-ending signal regardless of how good the light is.
In dogs:
- Lip-licking in the absence of food.
- Yawning in a dog who isn't tired.
- Whale eye — the white of the eye visible at the corner, often with the head turned slightly away.
- Shake-offs in a dog who isn't wet — a stress-release behaviour, frequent during high-arousal sessions.
- Tail tucking or held very low; ears pinned back; weight shifted backward.
- Refusing to take a treat that the dog would normally accept.
In cats:
- Tail flicking with increasing speed.
- Ears rotated sideways or backward ("airplane ears").
- Pupils dilated in even light.
- Whiskers held forward and tense, body crouched.
- Soft growl, hiss, or any vocalisation beyond a quiet meow.
- Hiding or attempting to leave the room.
Format Magazine's professional pet-photography practice builds in a 30–40 minute acclimation window before serious shooting begins, and explicitly cautions against costumes that are unsafe or uncomfortable. The flash-conditioning advice is notable: if you must use flash, give the pet a treat every time the flash goes off, so the animal pairs the unfamiliar burst with a positive outcome rather than a startle.
The photographer's role at home with their own pet is the same role the professional plays at a session: the human watches the animal's signals, and the camera waits. A photograph the animal participated in is a different photograph from one they merely endured, and the difference shows.
The Legacy Session: Photographing Aging or Terminally Ill Pets
There is a photograph I keep coming back to: a greyhound named June, fourteen years old, asleep in a pool of November light on the hardwood of a Montreal apartment. It is not a good photograph by any technical measure. It is also the only photograph Claire has of her dog in the last good week of her life. The photograph is doing the work photographs are for.
The legacy session — sometimes called a memorial session, a senior session, or an end-of-life portrait — is the fastest-growing genre in pet photography and the one with almost no consumer-editorial coverage. Practitioner studios building a sub-industry around it include Heidi Grace Photography in Calgary, Lance & Lili in the US, Pant the Town in MA/NH, Jenna Regan in Texas, and Paws Fur Joy in Raleigh. Many of these photographers now hold Companion Animal End-of-Life Doula certifications and Pet Loss Grief training to handle the emotional weight of these sessions.
If you are reading this with an aging pet, the practical work translates well to home photography:
- Shoot at home or in the pet's favourite outdoor spot. Senior pets manage mobility better in familiar environments, and the photographs hold context the studio cannot.
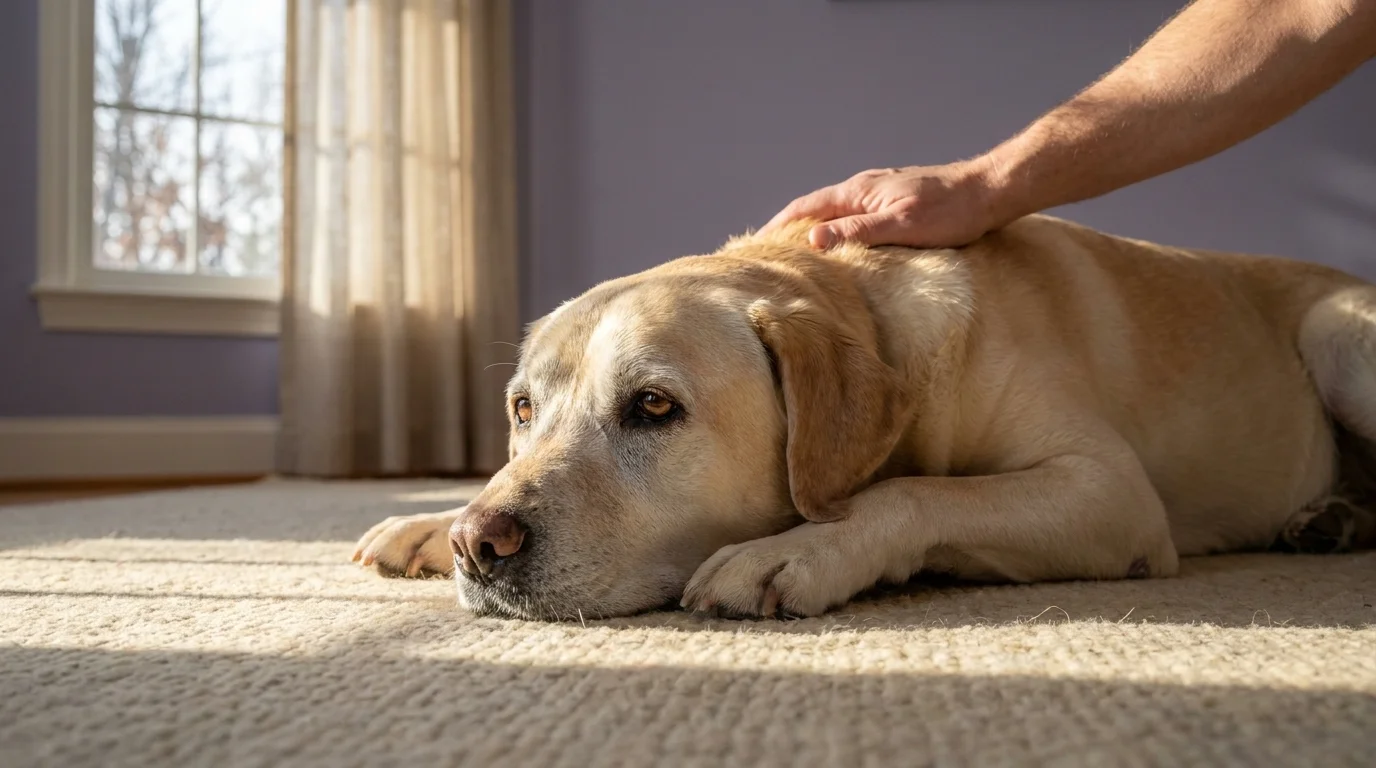
- Document the specific details that will fade from memory. The gray muzzle. The favourite toy with the worn corner. The way they lean into your leg when you're cooking. The collar with the tag rubbed smooth. These are the photographs you will go back to in two years.
- Prioritise close-up portraits and detail shots over full-action sequences. A senior dog's working repertoire is shorter; the close work captures more in less time.
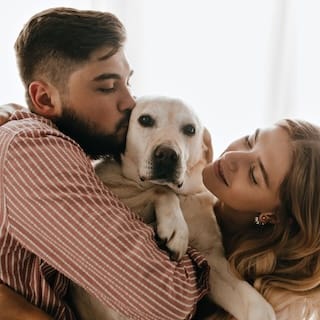
- Include the human in some of the frames. A hand on the back, a forehead-to-forehead moment, the lean. The relationship is the photograph as much as the animal is.
- Make some photographs the way you usually do, and make some you wouldn't. A black-and-white close-up of the eye. The paw on the floor. The view from above of a sleeping animal in a beam of light. Photographs that are not posed are often the photographs that hold up.
There is no photograph you will regret making. There are many you will regret not having made. If your pet is reaching the end of their senior years and you have been putting this off, let this be the line that gets you to pick up the camera this week.
Editing: Phone and Desktop
Editing is where most pet photographs go from competent to alive, and it is also where most of them go from alive to over-processed. The principle: less is more, and the goal is to make the photograph look like the animal, not like an Instagram preset.
Phone editing in 2026 splits between two dominant apps. Lightroom Mobile (subscription, included with Adobe Creative Cloud Photography Plan or Adobe Photography $9.99/month) is the heavyweight choice — its 2025 update added AI-powered Select Subject masking (essential for isolating the pet from the background to lift exposure on the dog only) and Generative Remove (one-tap removal of leashes, collars, and distracting background objects). Snapseed (free, Google) remains the best free option, with 29 tools in a 35 MB download — the Healing tool outperforms Lightroom's for one-off distractions, and the manual curves give you non-AI control over tone (Skylum, Android Police). For most readers the practical answer is: shoot in your phone's RAW mode, edit in Lightroom Mobile if you have Creative Cloud or Snapseed if you don't, keep edits subtle.
Desktop editing is a different conversation. Lightroom Classic and Photoshop's Generative Fill are the working photographer's tools — Generative Fill can extend a tight crop, replace a distracting background, or remove a leash with a click. Most pet owners will never need them.
A working editing pass for a single pet portrait, in order:
- Crop to compose the frame as you wish you had originally.
- Adjust exposure (typically a slight lift on shadows for darker coats; a slight reduction on highlights for lighter coats).
- Set white balance — pets photographed indoors often need a warm-up of the colour temperature to feel natural.
- Mask the subject and add modest sharpness to the eye, modest brightness to the face. Do not sharpen the whole frame.
- Remove one or two background distractions if present.
- Stop. The photograph is finished before you think it is.
A Brief Closing Note
A photograph is, in the end, a small portable record of the time when this animal was here and you were watching them. The technical fundamentals above will produce sharper, better-exposed, more expressive frames. But the part that makes a pet photograph hold up over years is not technical. It is the photographer paying attention to one specific animal in one specific light, paying respect to the body language the animal is showing you, and being willing to put the camera down when they ask you to.
Make the photographs. Make them with the camera you have. Make some of them of your pet asleep, of the paws, of the lean, of the moment when they look at you and you happen to be ready. You will be glad you did.
Last reviewed 2026-04-29 by Julian Delacroix.
Frequently Asked Questions
Dial in -1/3 to -1 stop of negative exposure compensation; the camera's meter will otherwise try to make the dog middle gray. Shoot in open shade or on a cloudy day (the cloud is a giant softbox), and position the dog so they are facing a soft light source — open sky or a window — to give the eyes their catchlights. Underexpose slightly rather than overexpose; you can recover detail from shadows in Lightroom but not from blown highlights. For white or cream coats, flip the rule: dial in +1/3 to +2/3 stop and expose for the white.
iPhone 15 Pro and later for portraits — they auto-detect cats and dogs as Portrait subjects and capture Apple ProRAW files with editing headroom comparable to a mirrorless camera. Pixel 8 and later for editing — Magic Editor (free for all Google Photos users at 10 saves/month, unlimited on Pixel or Google One Premium) lets you reposition the pet in the frame with generative fill. Both phones produce gallery-grade pet photographs at conversational distance. For action work, iPhone Action mode and 10 fps burst are the practical tools.
Find a window with soft daylight and position the pet so the window is in front of them or at a 90-degree angle (side light gives the eyes their dimensionality). Push the ISO to whatever you need to maintain at least 1/250s shutter — typically 1600–3200 on a mirrorless camera, the phone's Night mode at the equivalent. Use a wide aperture (f/2.8 if you have it) to maximise the available light. Avoid flash with cats, who are often spooked by it; if you must use flash with a dog, treat-pair every flash so the dog learns the burst means good things, not threat. Continuous LED light is the professional choice for studio work.
It's increasingly mainstream and increasingly important. A growing number of professional pet photographers — Heidi Grace Photography (Calgary), Lance & Lili (US), Pant the Town (MA/NH), Paws Fur Joy (Raleigh), Jenna Regan (Texas) — now offer dedicated legacy sessions for senior pets and pets with terminal diagnoses, and many hold Companion Animal End-of-Life Doula certifications. At home, the same work translates: shoot in the pet's familiar environment, document the specific details that will fade from memory (the gray muzzle, the favourite toy, the lean), prioritise close-up portraits and detail shots over action sequences, and include the human relationship in some of the frames. There is no photograph you will regret making.
You don't, mostly — and the photographs of cats not looking at the camera are often the better photographs. Cats are not as cue-trainable as dogs, and a cat photographed in the act of being a cat (ignoring you, watching a bird, sleeping in a sunbeam) usually produces stronger images than a cat staring directly at the lens. If you do want eye contact, slow blink at the cat first to establish trust, then make a quiet sound (a soft kissy noise, not a click or whistle) right at the moment you want the look. Each sound cue works once or twice per session before the cat tunes it out. Patience and waiting beat any active cuing.
1/250s for stationary or slow-moving pets; 1/500s for trotting or walking; 1/1000s minimum for a dog running toward the camera (1/1250s is safer). Pair with continuous autofocus (AF-C) and animal eye detection if your camera supports it — every Canon EOS R-series body since the R10/R100 has it, as do current Sony, Fujifilm, and Nikon Z bodies. Shoot in burst mode at 10 fps minimum (30 fps if your camera supports it), shoot wide open at f/2.8 for subject separation, and push ISO as high as you need to keep the shutter speed up. Underexposing slightly is recoverable; motion blur from a slow shutter is not.